Thursday, March 27, 2014

WNOTD: Work Nails of the Day

Hey everyone!

As I was trying to come up with a name for this post, I decided that it would be cool to make a segment called Work Nails of the Day (I'll come up with something better though lol).

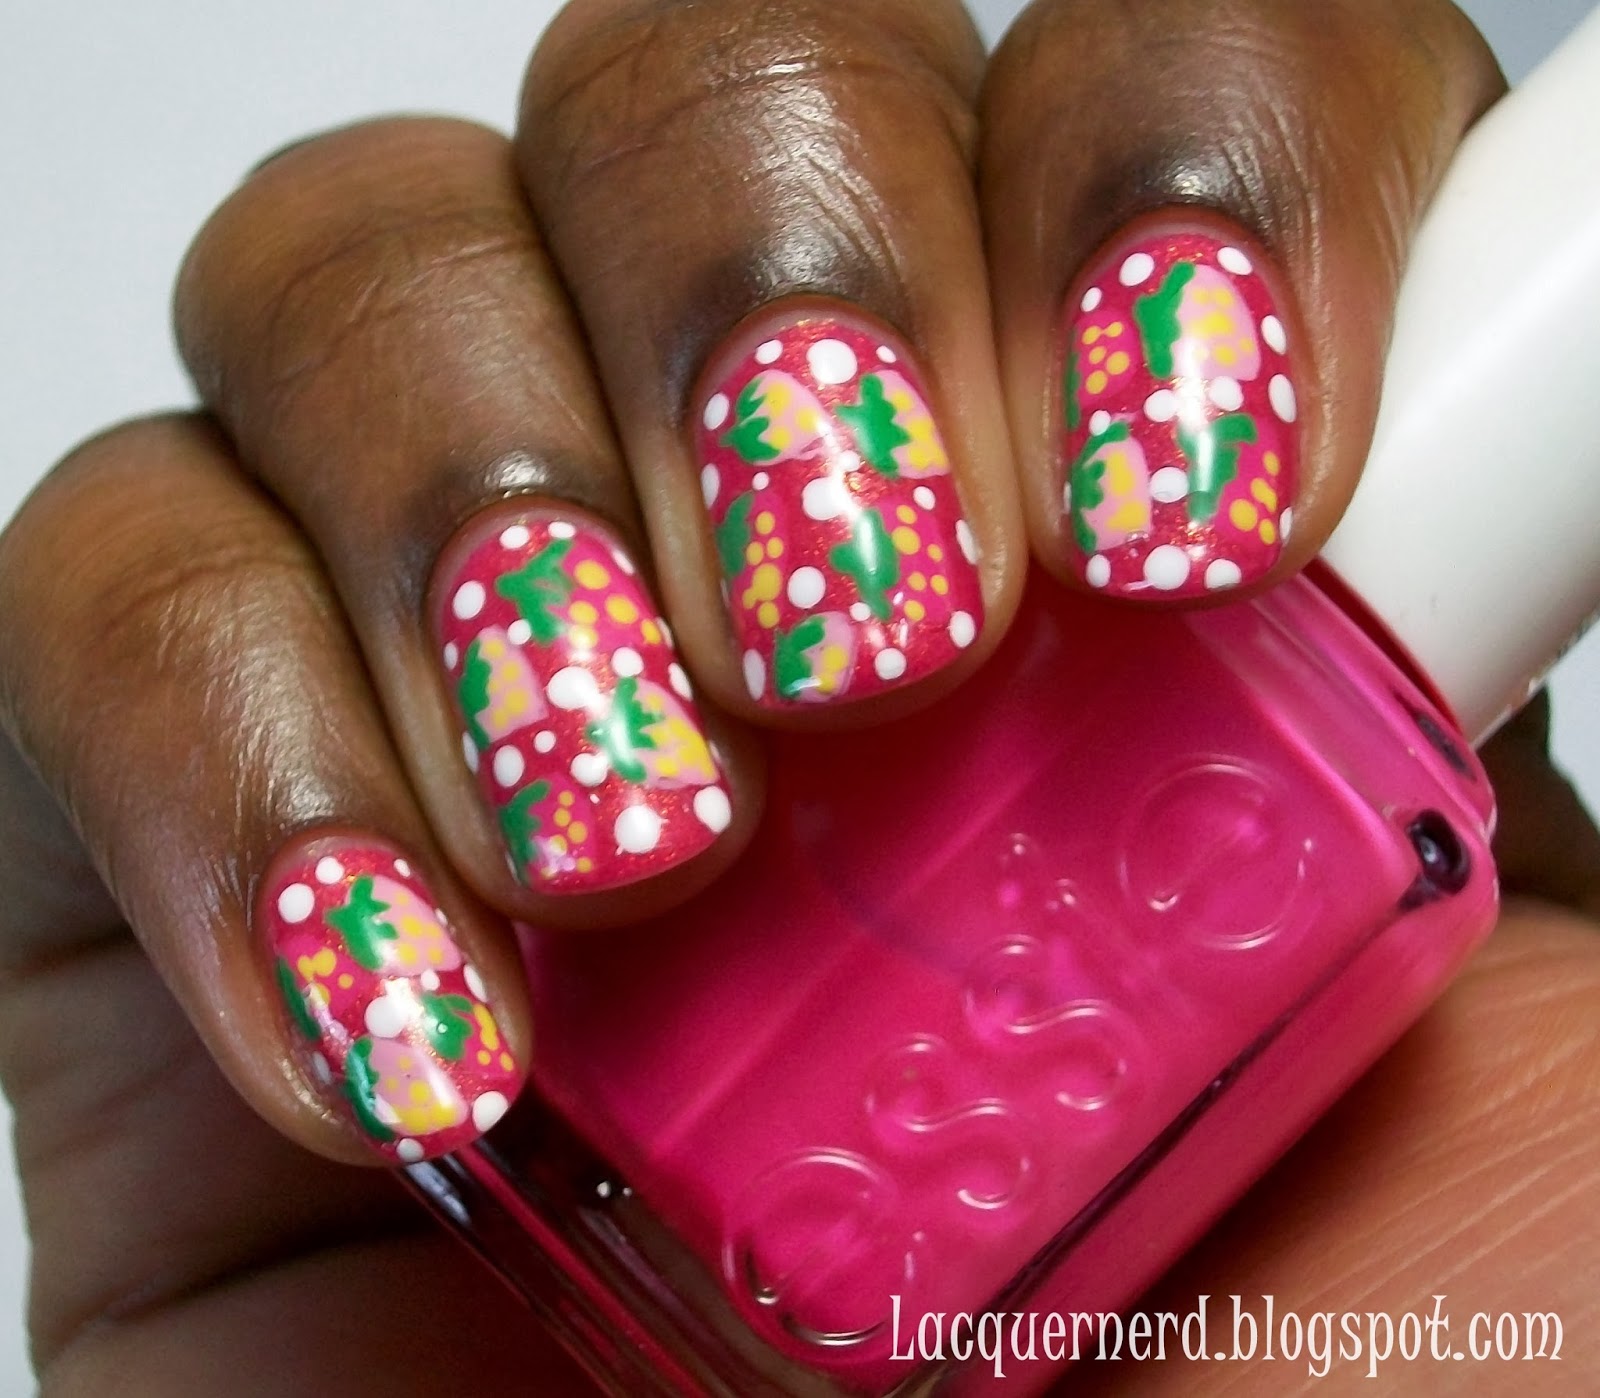
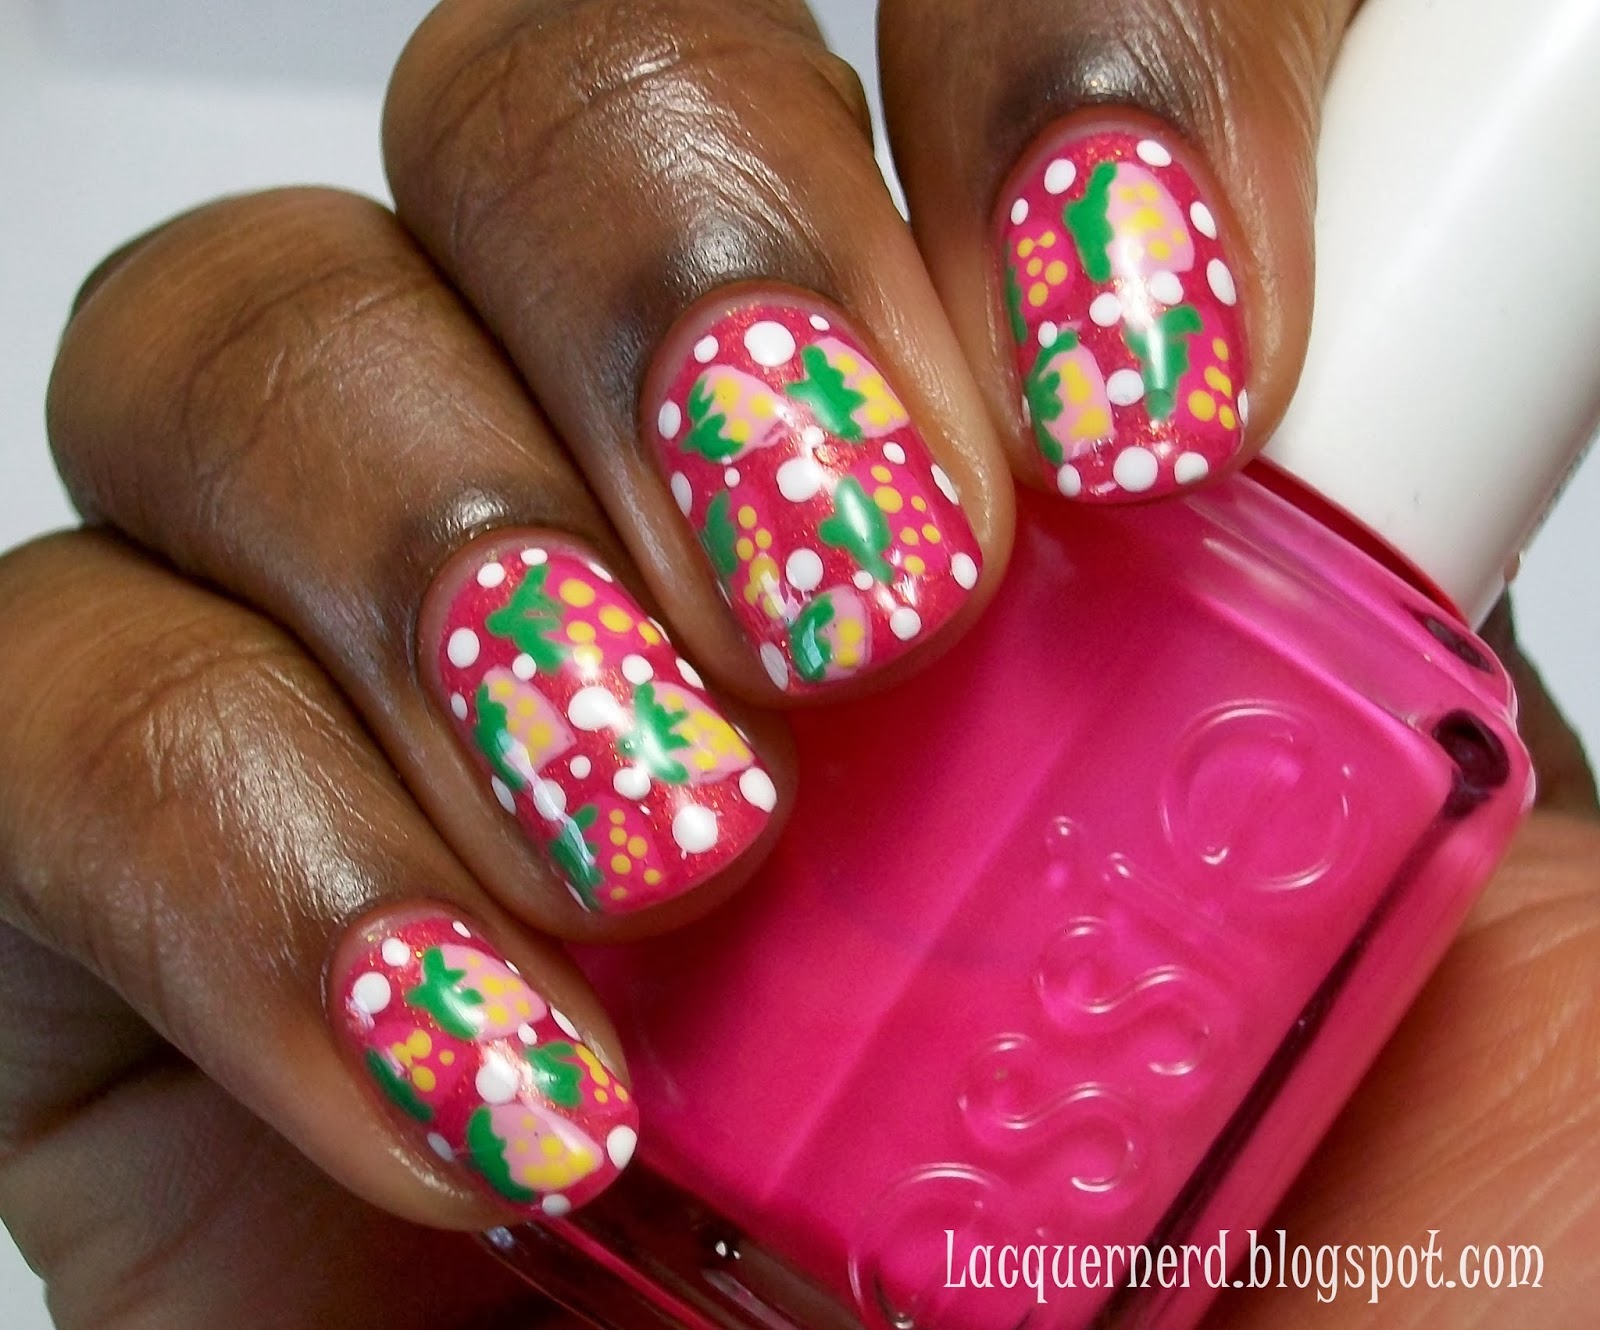
I'm pretty glad that my job lets you wear nail polish because I would die if I couldn't. I can also pretty much do anything. I've seen girls wear pink glittery nails, light blue nails, purple nails, you name it! It's great because I can do nail art as well and there's no limit in what I can do!

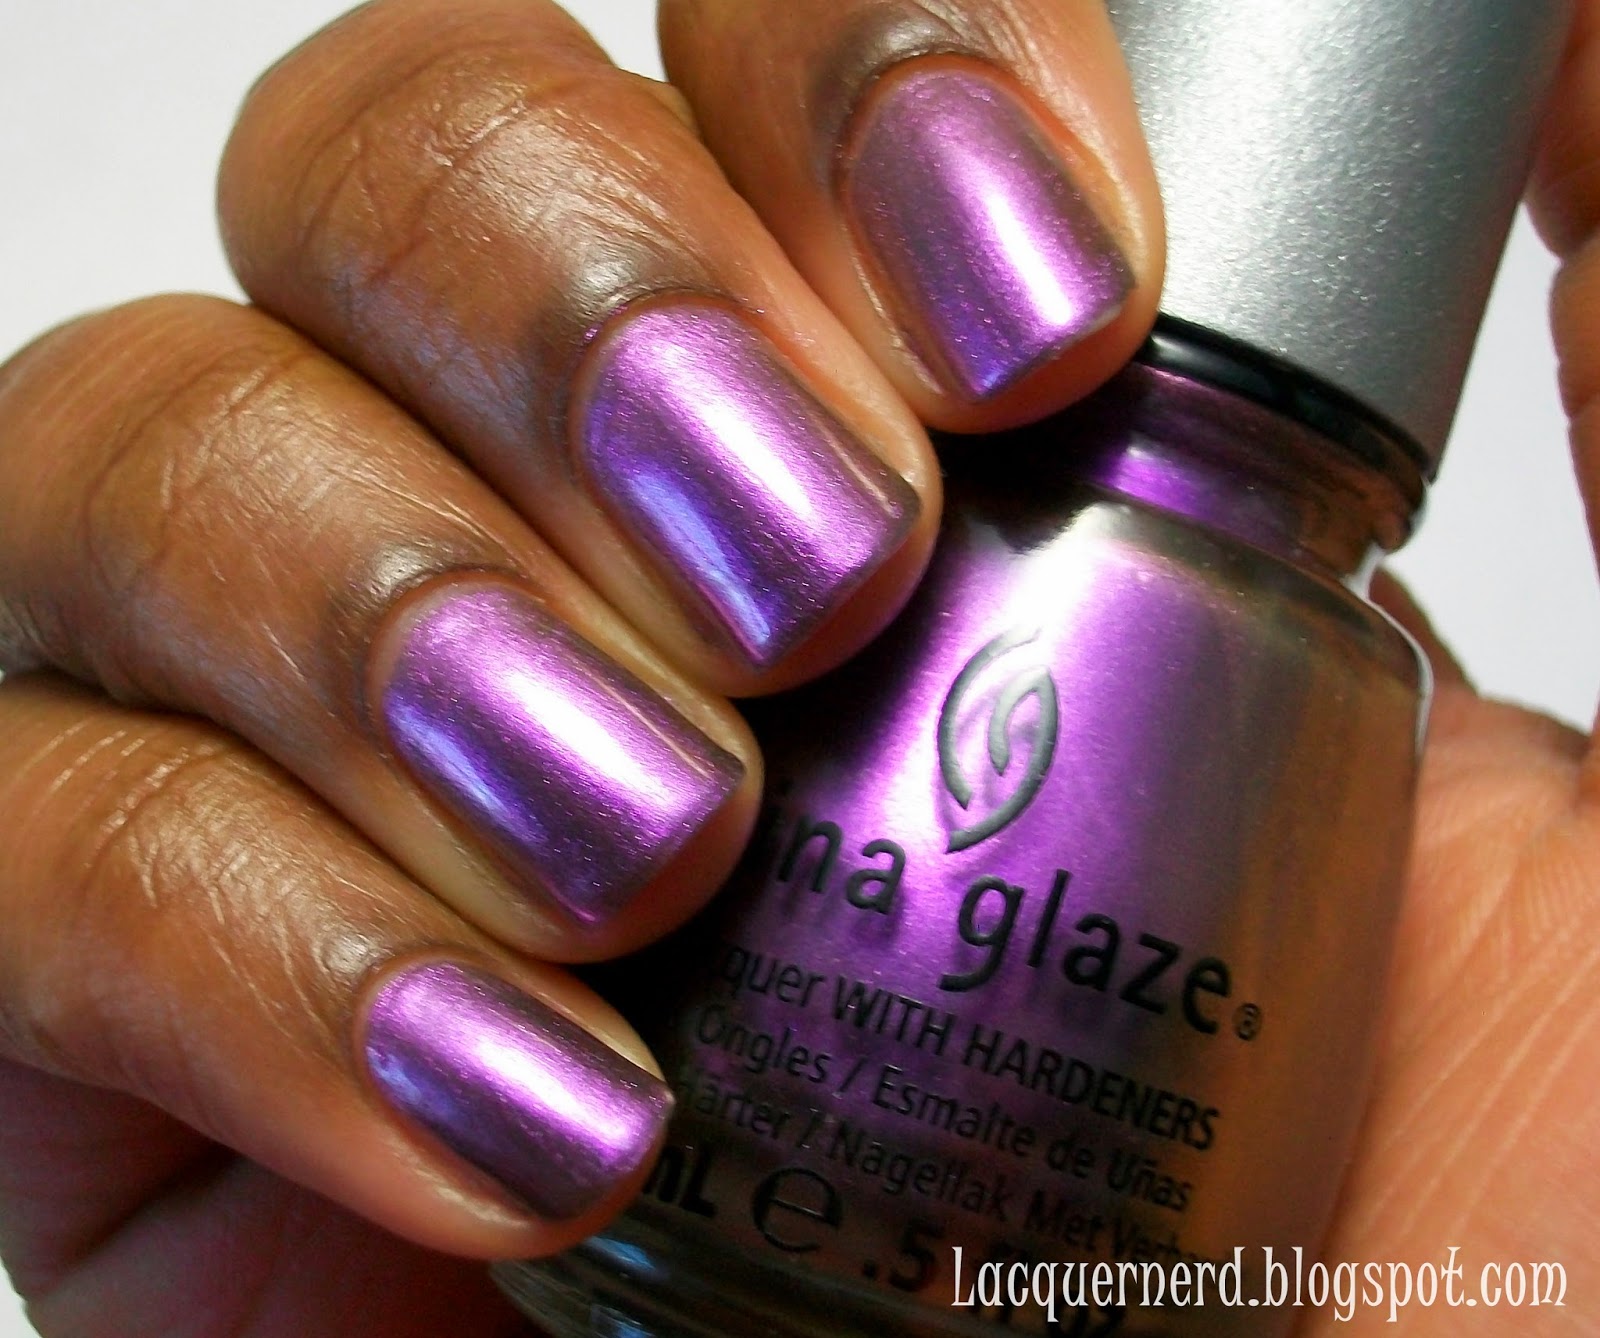
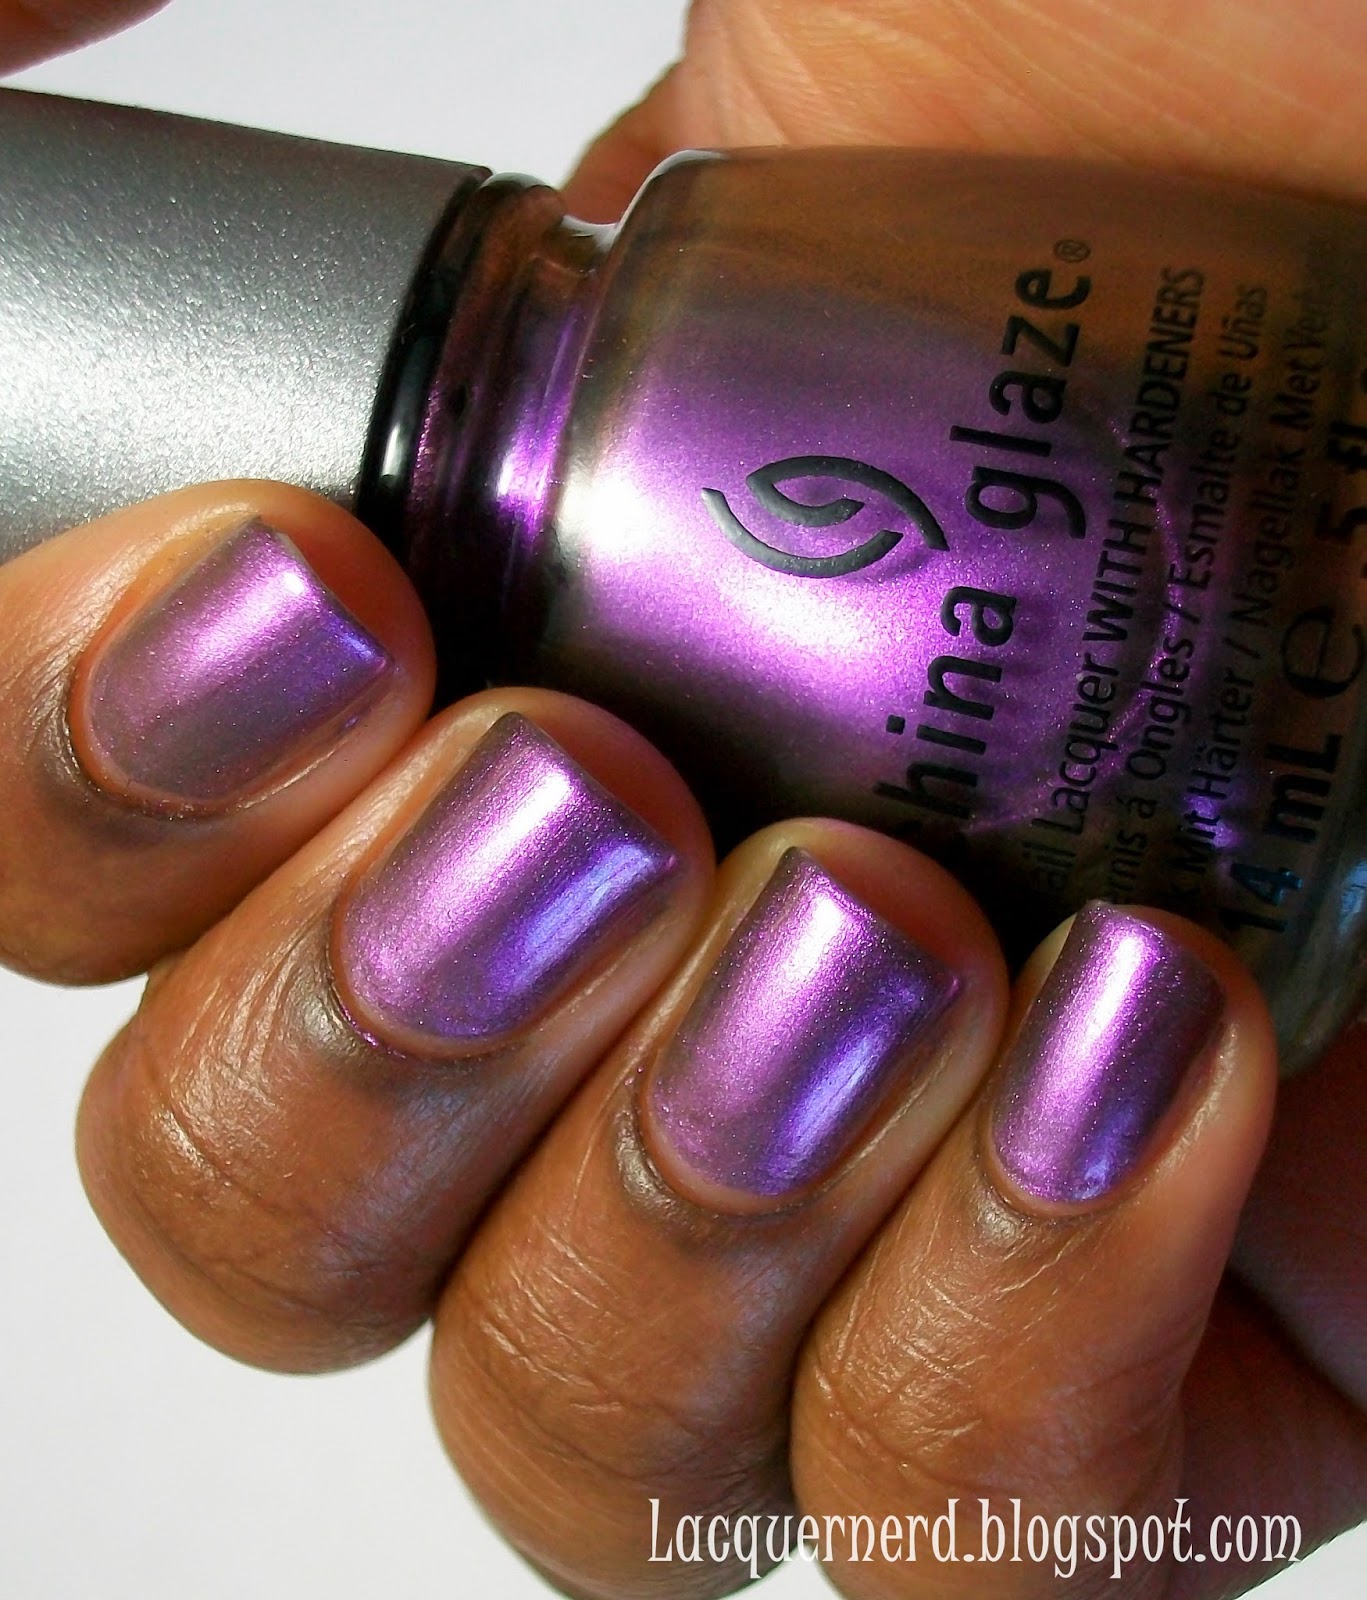
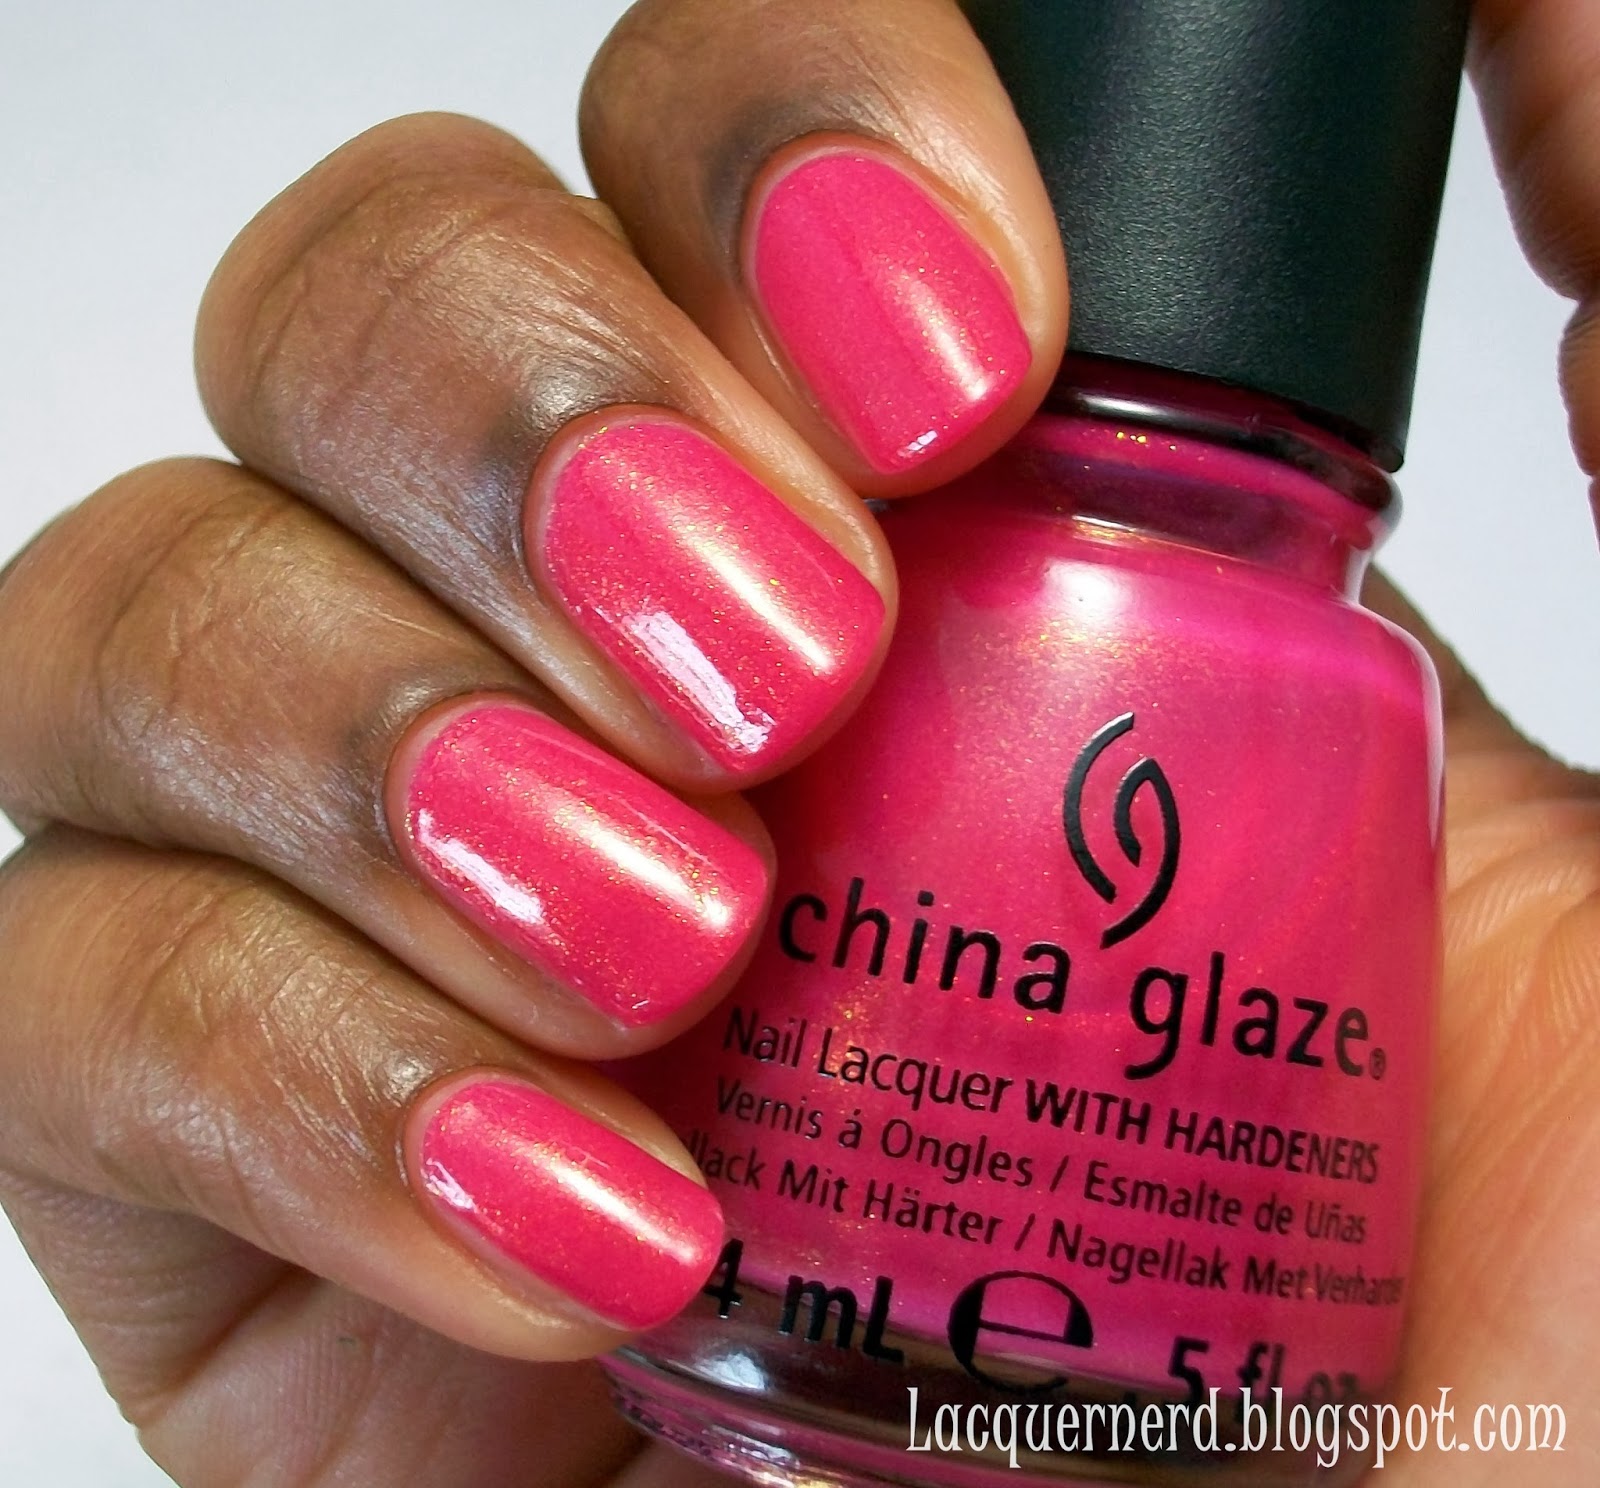
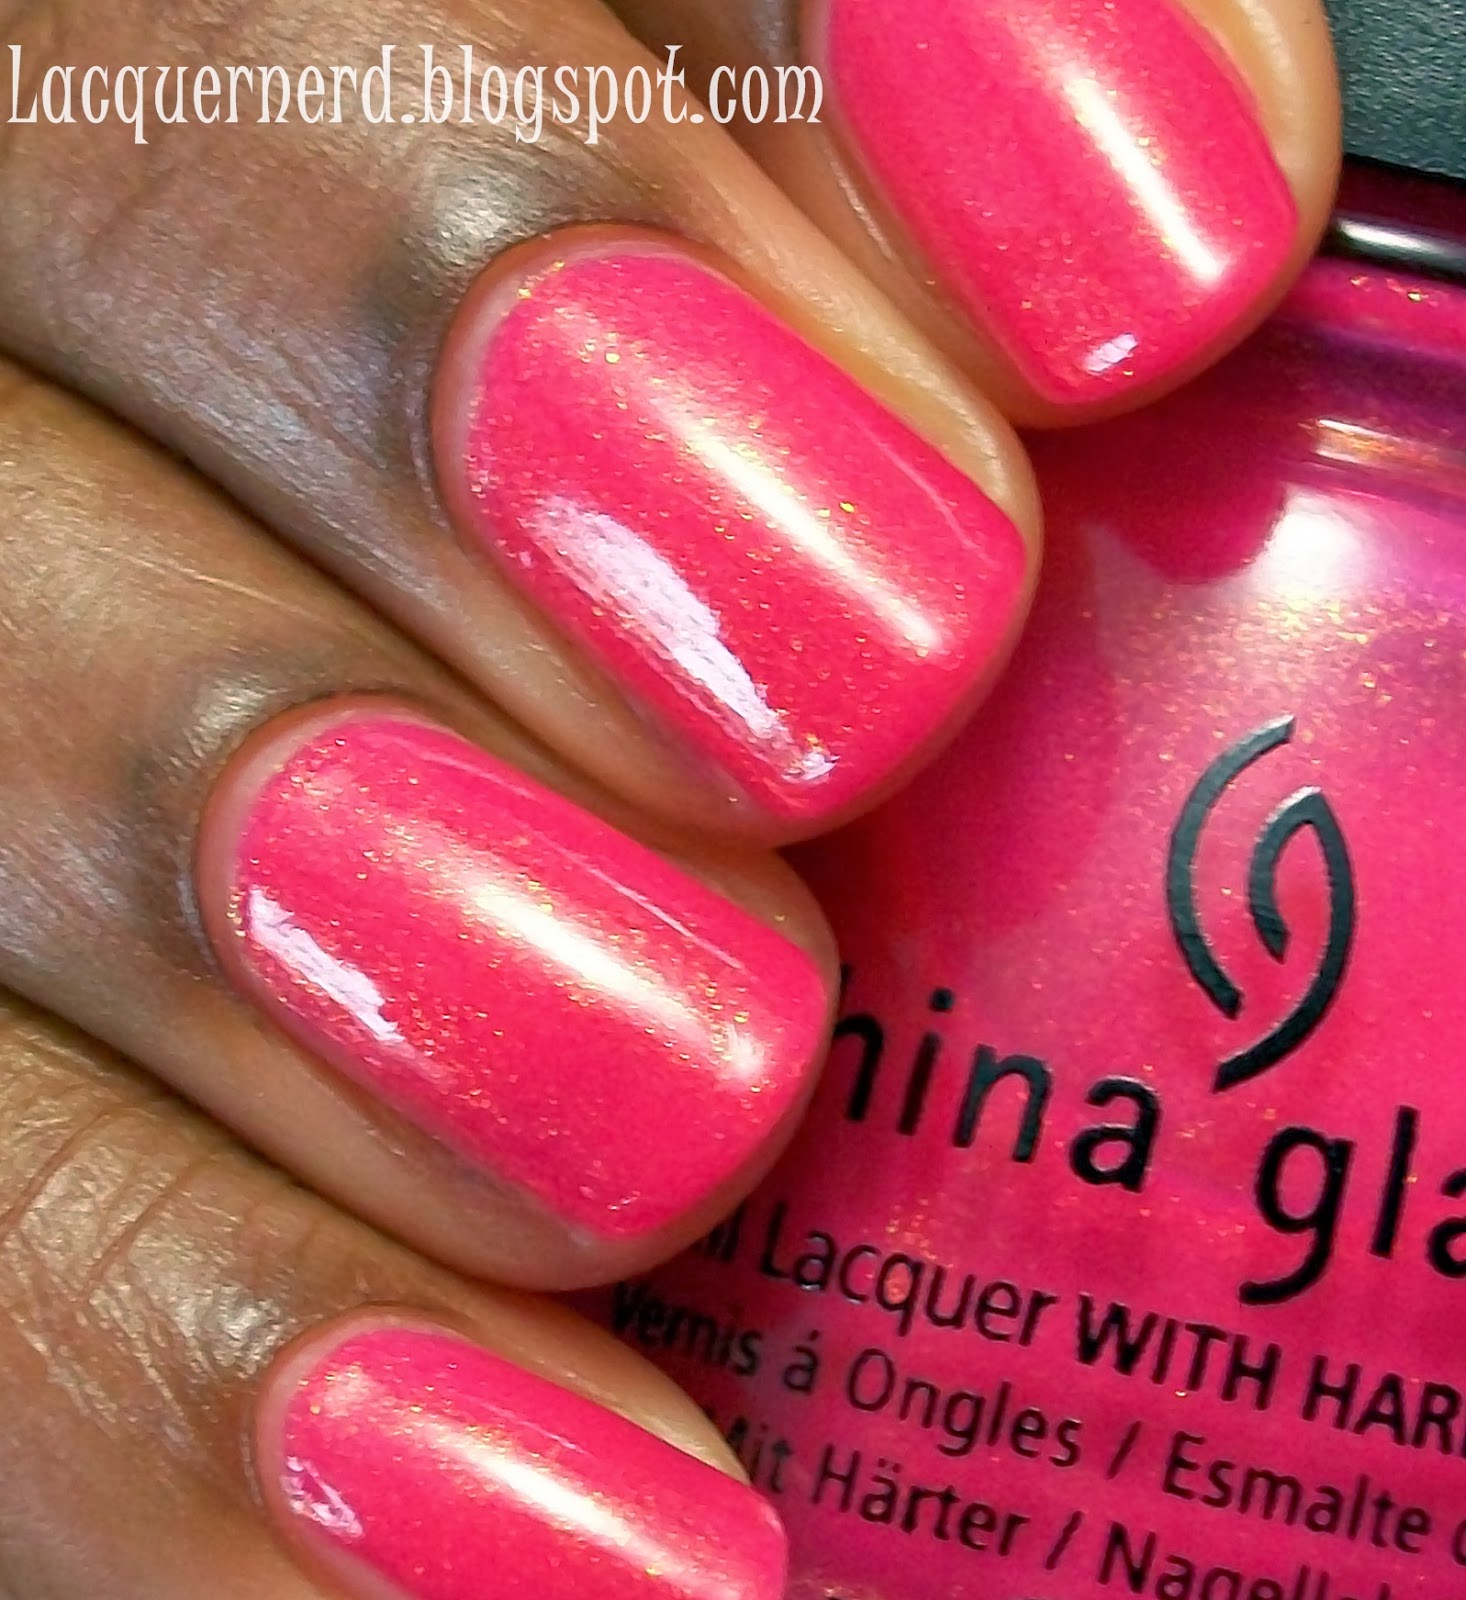
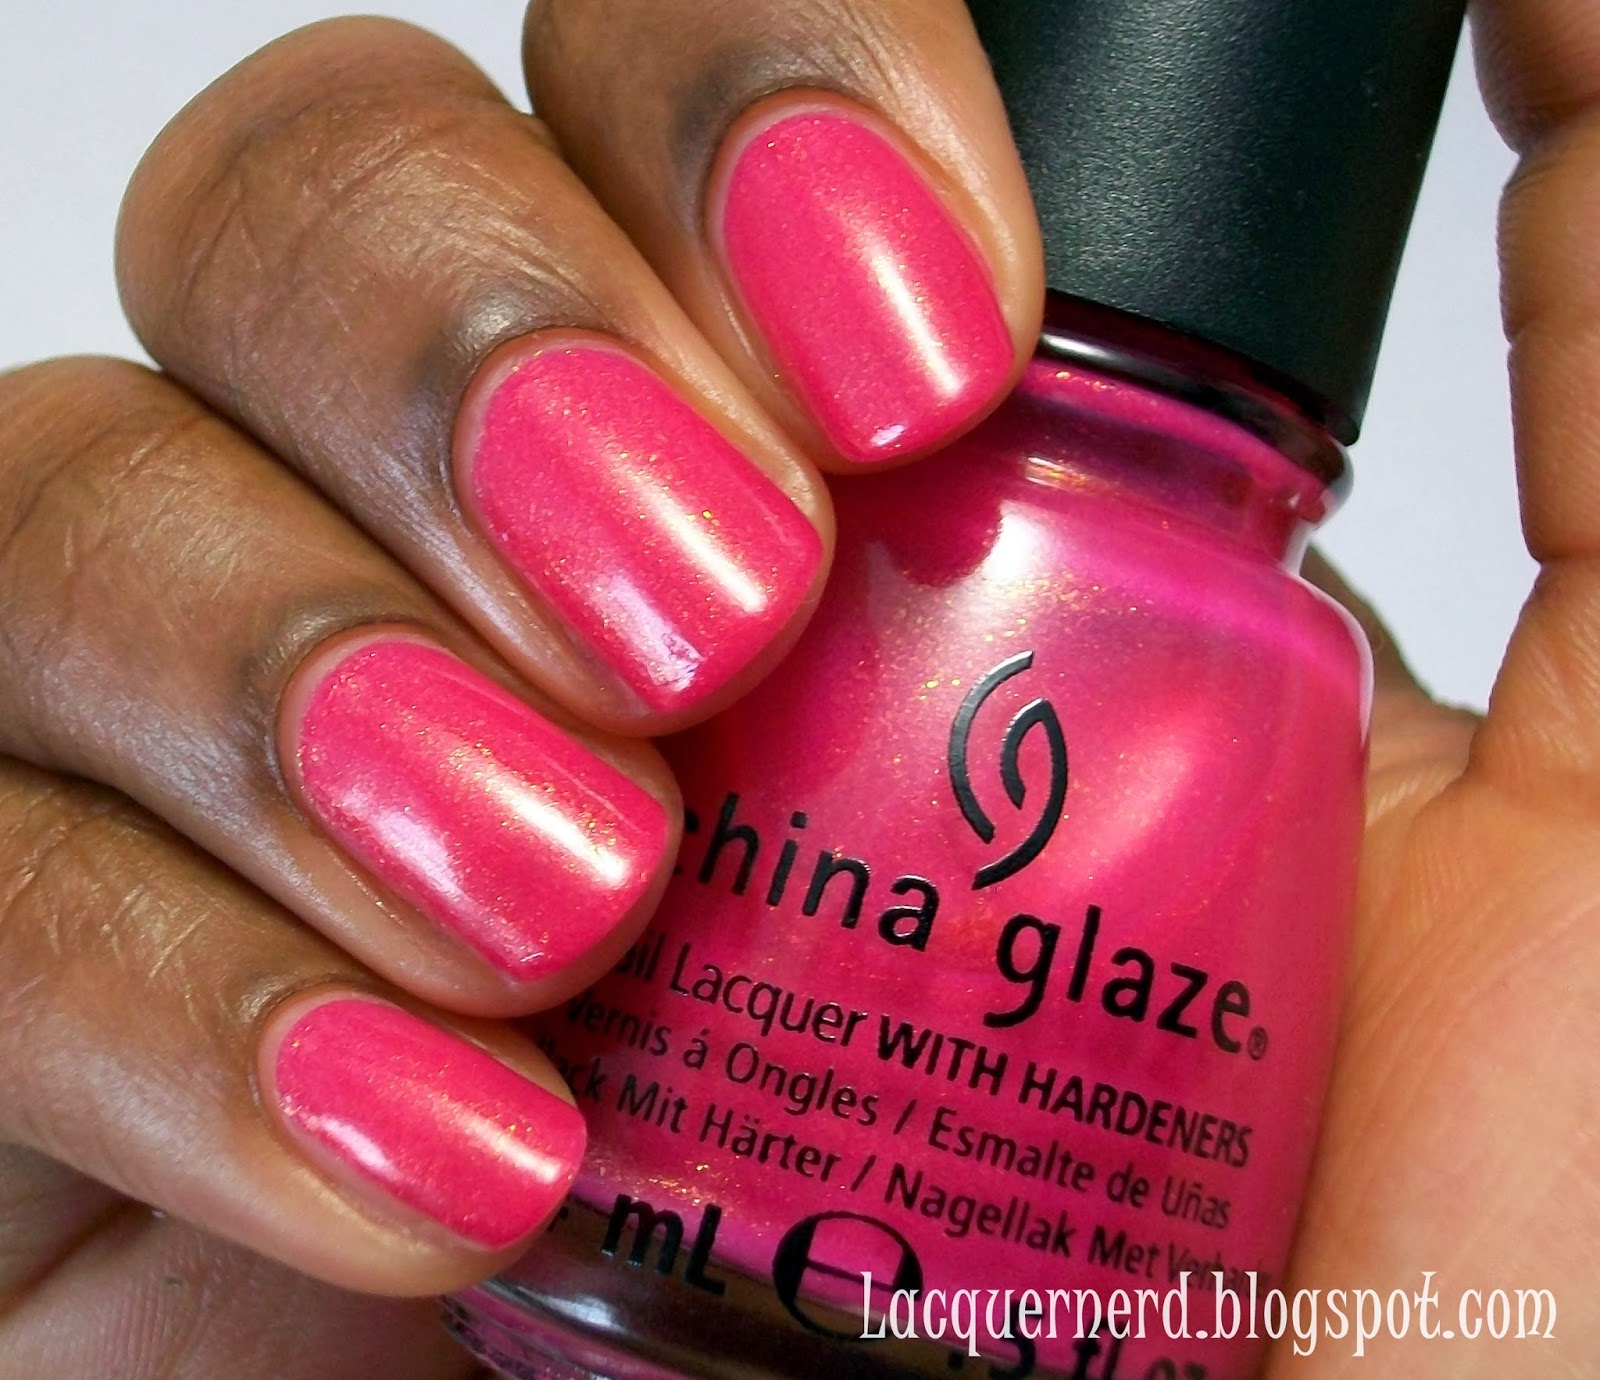
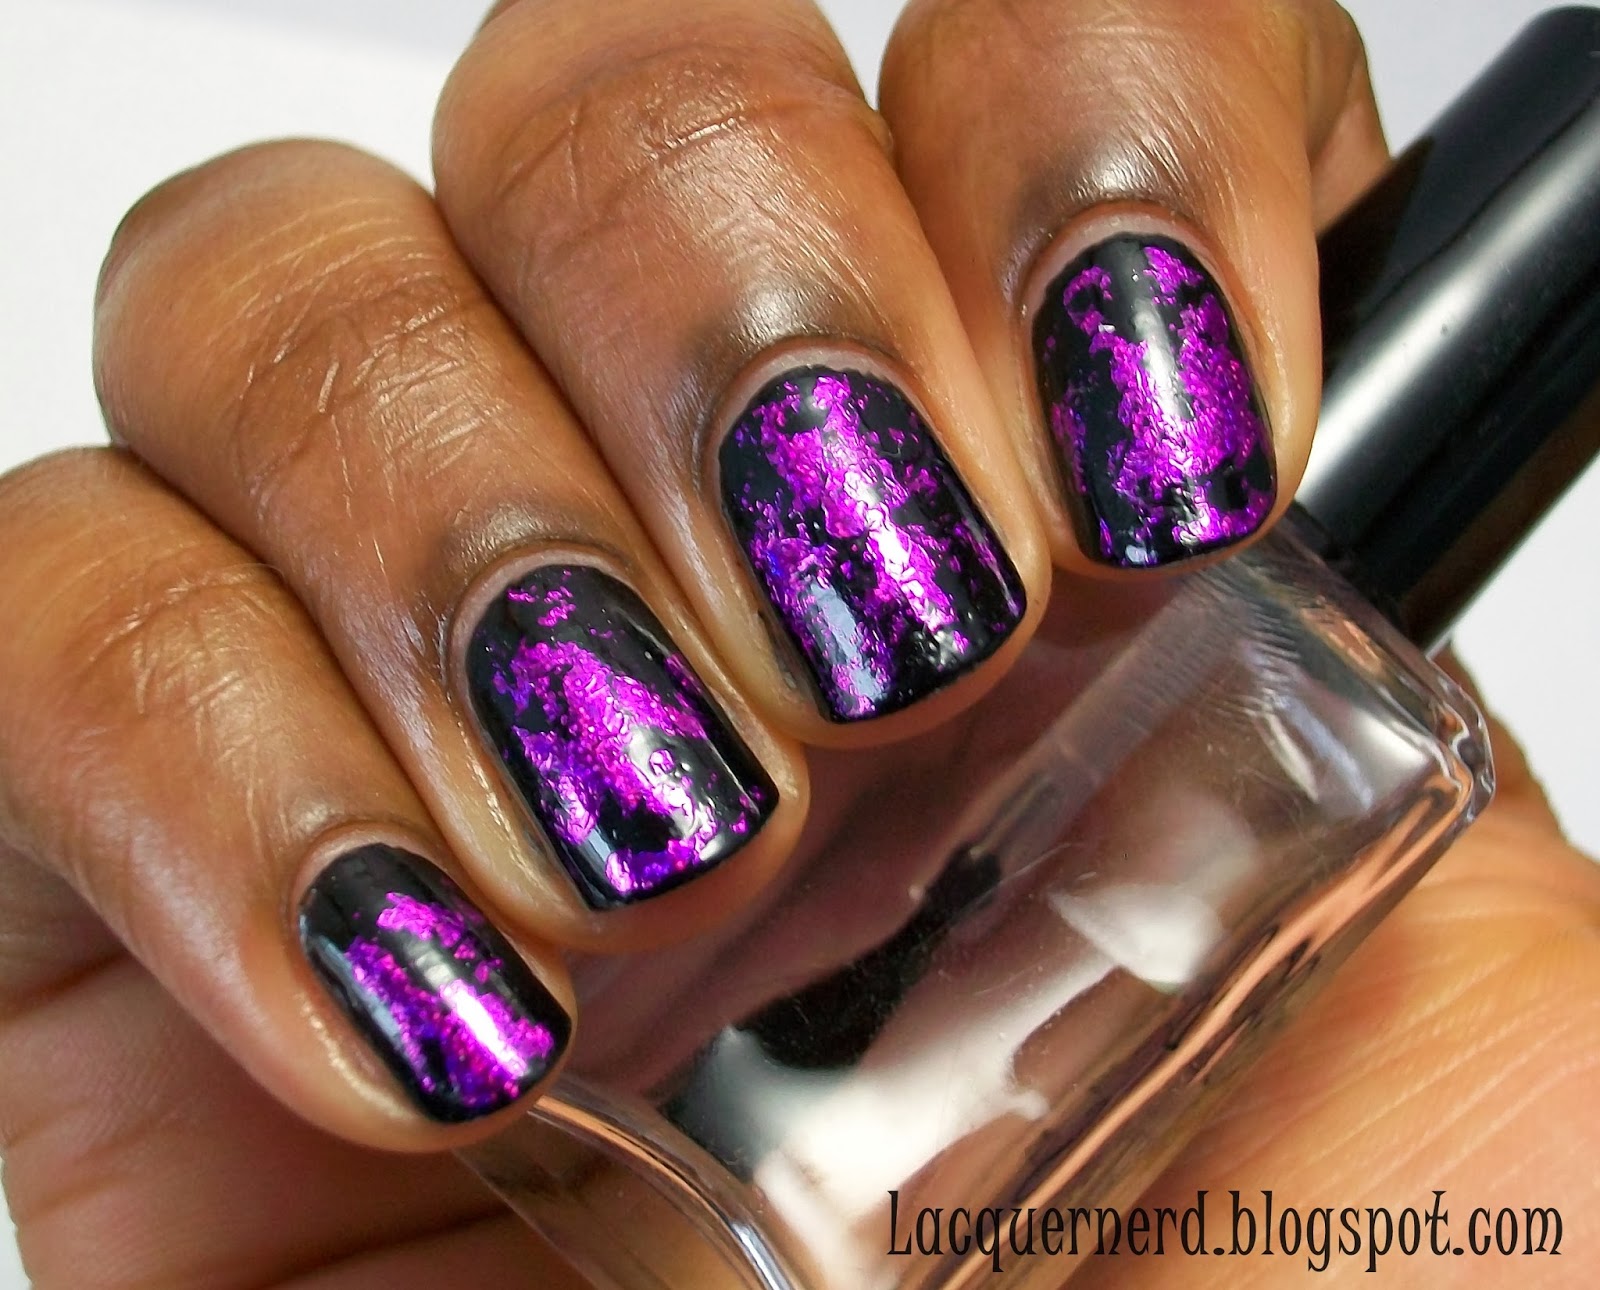
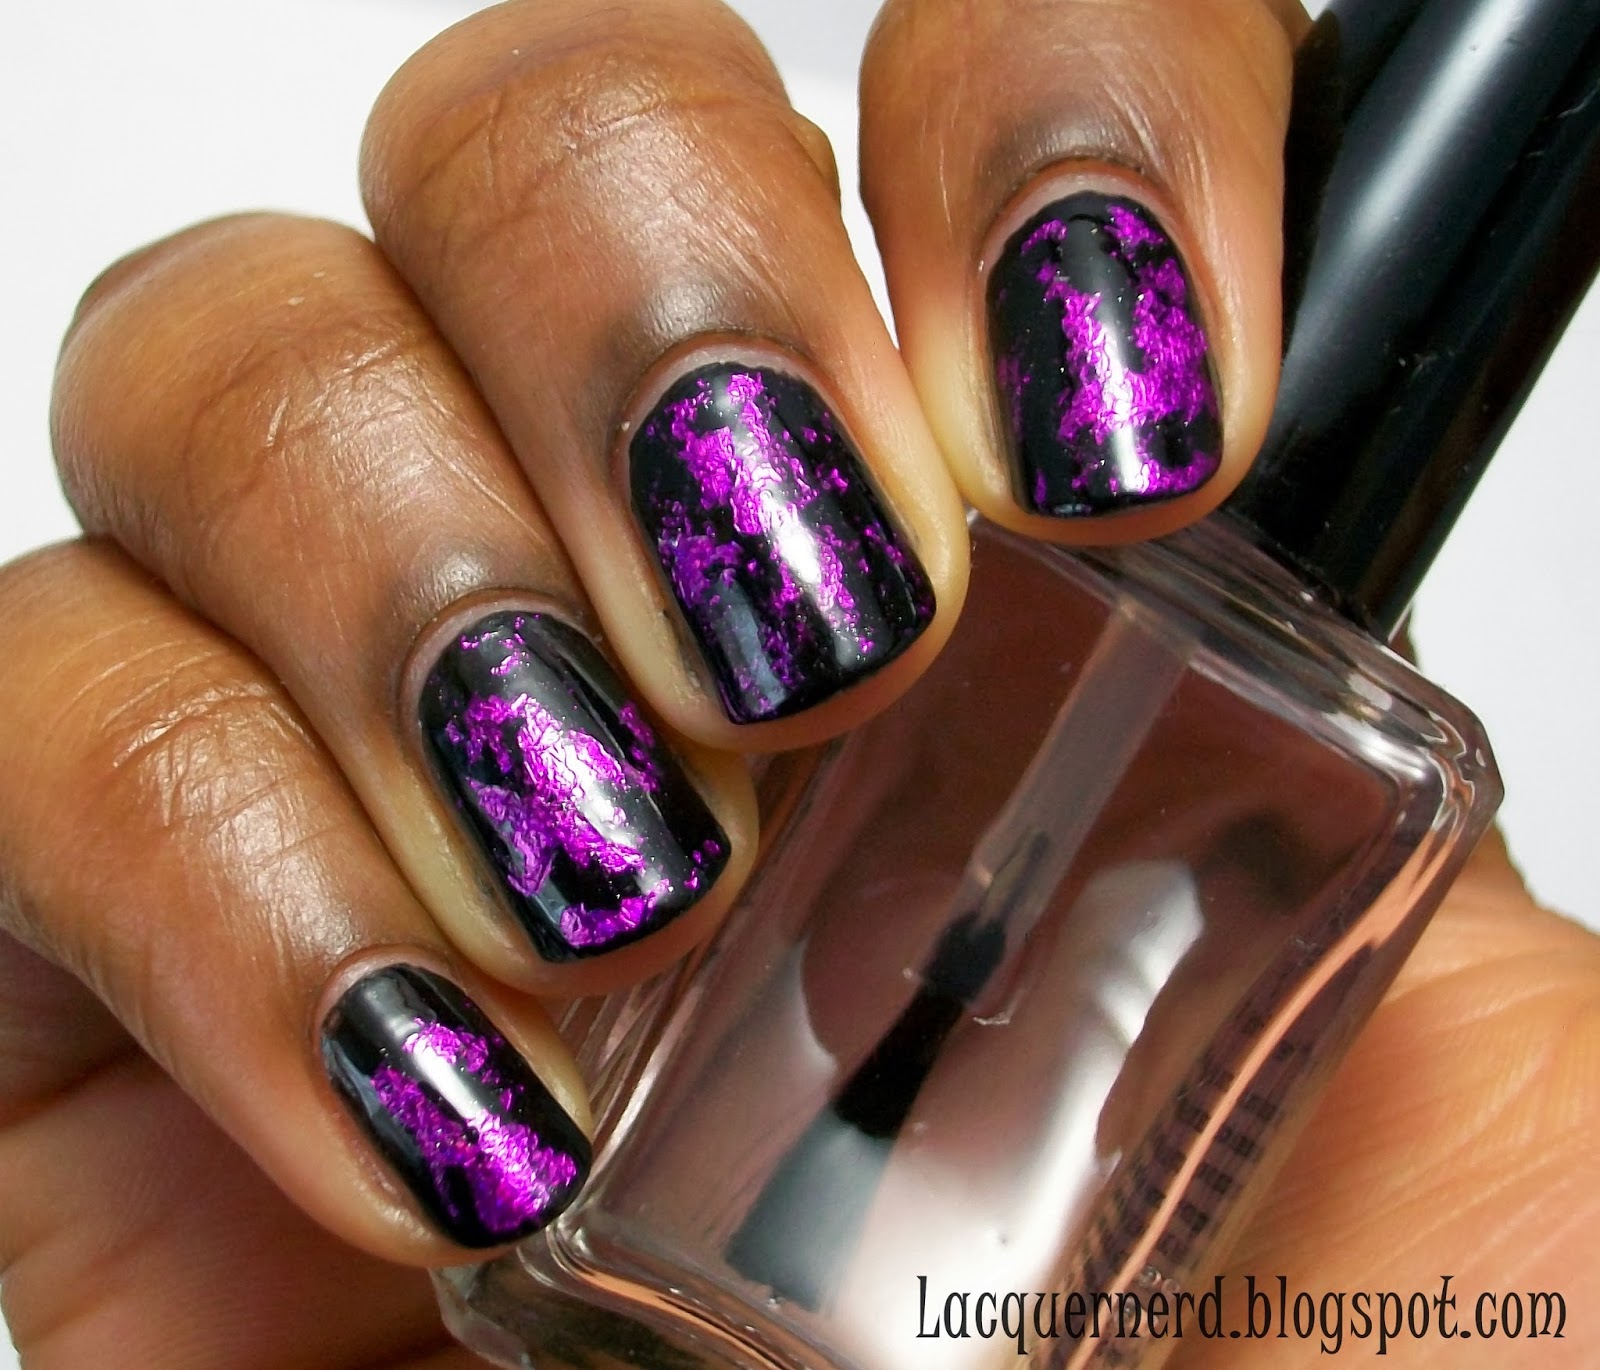
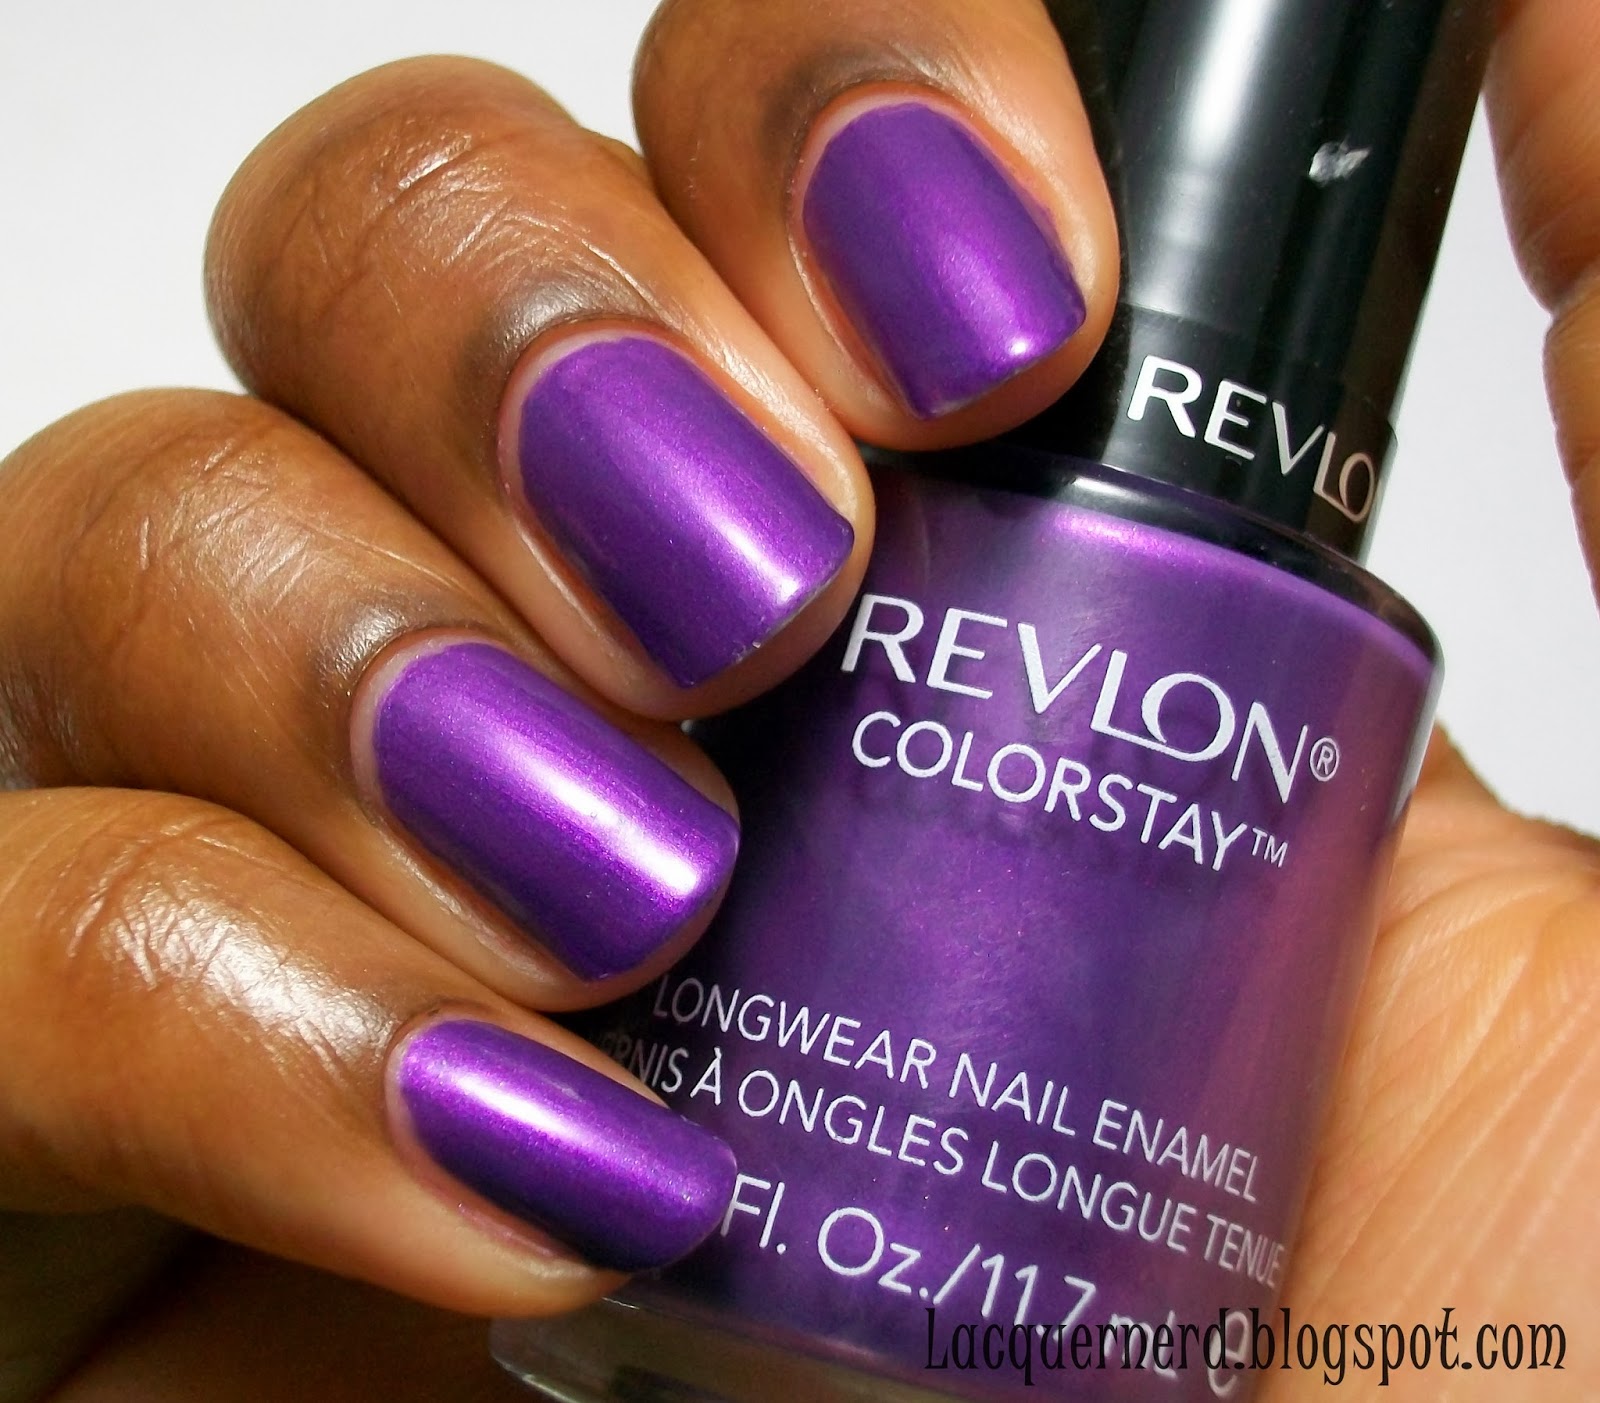
For today's WNOTD, I used two unnamed Color Club mini polishes.


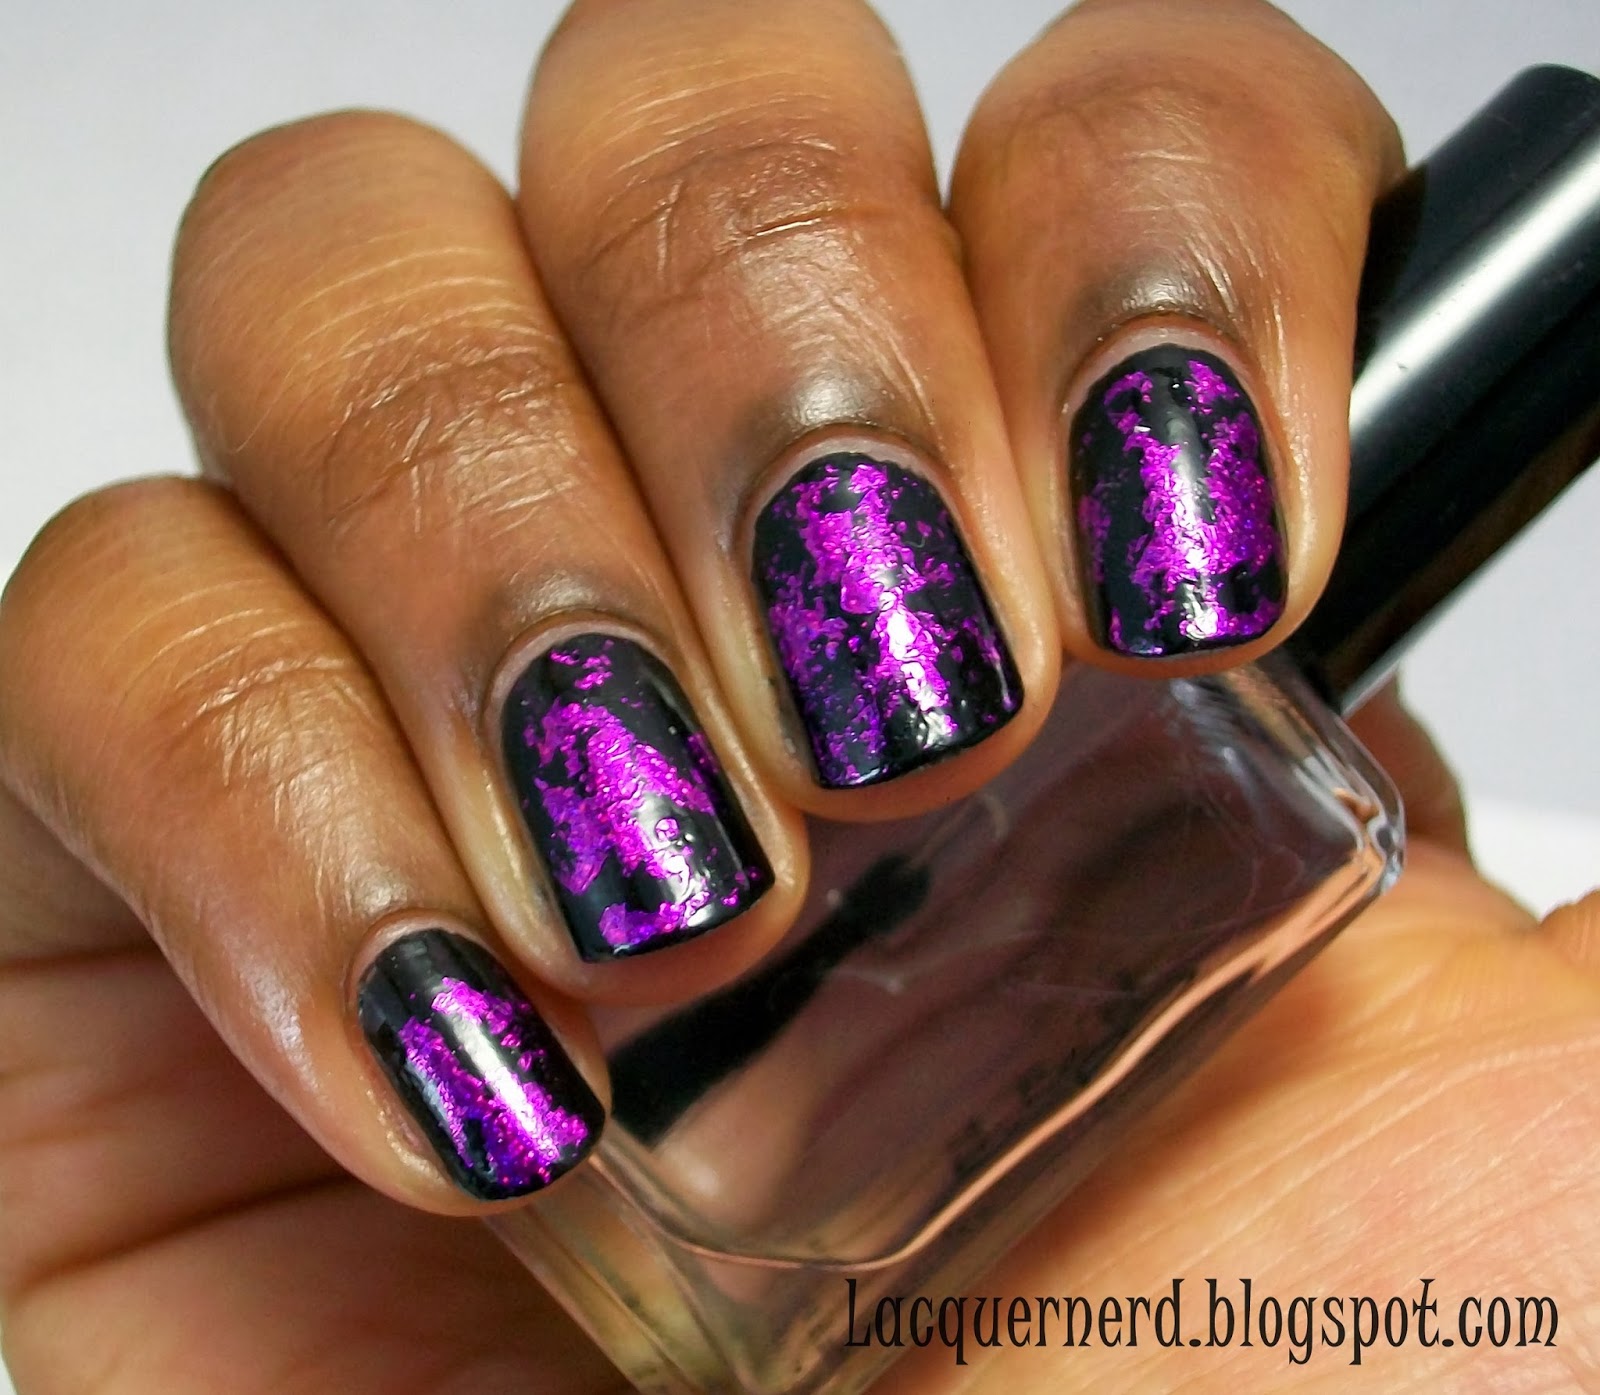
I wish I knew what the color names were for these, but I absolutely love these together. I usually don't do glitter because it's a pain to remove, but this color combination is to die for!


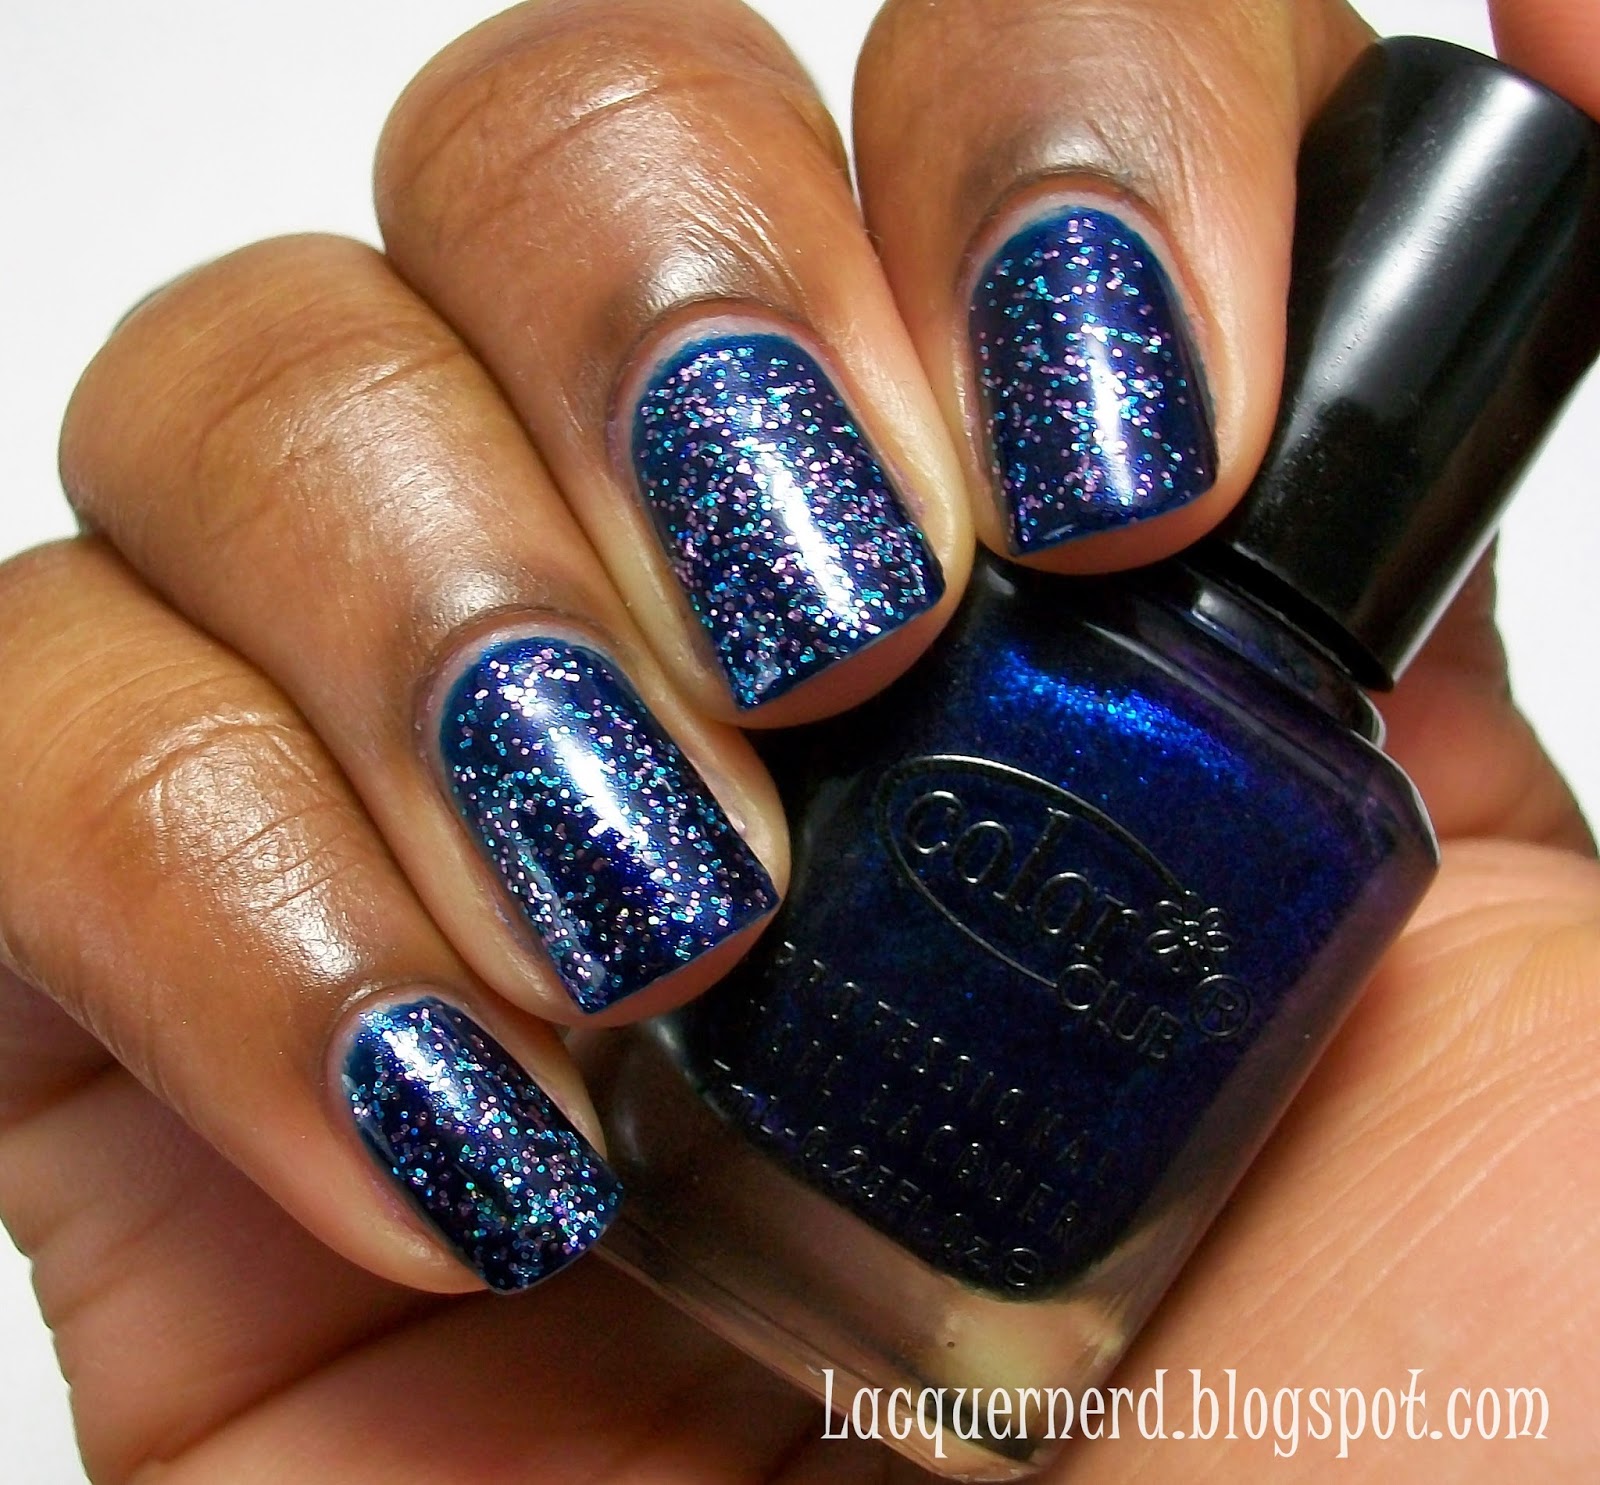
These came in a four pack, so I'll have to try the other two polishes together. The pack has two polishes and two glitters, so I hope the other ones pair together nicely like these two did.


So that was today's WNOTD. I think this will be a nice little segment for the blog, so I'm pretty excited. I hope you all enjoyed it as well! Let me know if you'd like to see this segment more.

What do you think of this mani? Can you wear nail polish to work?

Thanks for reading!

Wednesday, March 26, 2014

I'm back (for now!)

Hey everyone!

Well the past few weeks have been pretty busy due to me training for my new job. I had to study for all these tests and learn everything. It was pretty stressful. I'm getting back into doing my nails, but since I still don't know my schedule I've been working out how I can get back to blogging regularly.

For the time being, my posts are going to be kind of scattered until this schedule thing gets situated. I'm trying to schedule some posts at the moment so there's something for you all to see. I'll still be doing swatches and nail art when I can, so nothing will change with that.

Starting tomorrow, I'll have a post up and ready (hopefully!) so I can get back on track.

Thank you all for waiting (if you all waited lol) and sticking with me through all this and the blog!


Monday, March 17, 2014

St. Patricks Day Nails

Happy St. Paddy's Day everyone!

I don't really celebrate St Patrick's Day, but I decided to do a simple nail art design for today. I didn't really want anything too fancy, so I went the simple but festive route with these nails.


For this design, I used striping tape to create the lines. After applying my base coat, I placed two pieces of tape onto the nail for the lines. With the bottle brush, I filled in the spaces with Sally Hansen's Sunkissed, Sinful Colors Snow Me White, and Essie Mojito Madness.


With a detail brush, I created accent lines using Sinful Colors Gold Metal. Next, I placed a dot of top coat on the bottom of the white stripe and placed a gold gem on each nail. Finally, I finished off with a top coat to seal in the gems and design.


I love how this design looks. I haven't used striping tape and gems in a while, so it was nice to use them in this manicure. Even though the two golds don't match exactly, I think it's a nice color combination. I think all the colors go together pretty well. I never thought that this color combination would look nice lol.


What do you think of these St Paddy Day nails? Do you celebrate St Paddy's Day?

Thanks for reading!

Sunday, March 16, 2014

China Glaze - No Plain Jane

Hey everyone!

I've been so busy lately with getting ready to start this new job that I haven't had time to post or wear any nail polish. I think today will be dedicated to swatches and scheduling posts though, which will be a lot of work. I'm prepared though.

Anyways, today I'm sharing a swatch of China Glaze No Plain Jane.


No Plain Jane is a metallic purple duochrome (subtle orange-gold-red-pink shift). This is three coats with a top coat. 


The application and formula was okay. The only thing is that you can kind of see your brush strokes, which is common for a metallic polish. 

As far as the duochrome, it's very subtle but it shifts into a brown almost gray color. You can also see some gold, orange, red, and pink in it, but it definitely looks more metallic on the nail. I wish the duochrome was a bit stronger in this polish because it's kind of plain. At the same time, I do like it.


Overall, I'm on the fence about this polish. I like the duochrome, but I wish it was a little stronger to make it more interesting. I still like the color though and it's cool to see the shift in colors. If you like duochrome polishes, this would be right up your alley.

What do you think of this polish? Do you like duochrome polishes?

Thanks for reading!

Tuesday, March 11, 2014

Strawberry Nails

Hello everyone!

Yesterday, I showed you all a swatch of China Glaze's Strawberry Fields. It inspired me to do some nail art with the polish. Plus, I just can't get enough of strawberries! Let's see the design!


For this design, I started out with Strawberry Fields as my base color. With a detail brush, I made rounded triangles for the strawberries (think of an upside down triangle with a rounded out bottom) with Essie Lights and Wet n Wild's Tickled Pink.


Next, I created the stems of the strawberries with my detail brush with Essie Mojito Madness. For the dots, I used a dotting tool and created dots in the empty spaces of the nail with Sinful Colors Snow Me White. Finally, I topped it off with a top coat.


I love this design. I think I could have used another coat of Essie Lights for the strawberries because the color kind of blends in with the base color. It is a good color for strawberries though (and roses too!). I wish I could keep it on my nails forever, but I know I'm going to get sick of it eventually lol. 

What do you think of this design? 

Thanks for reading!

Monday, March 10, 2014

China Glaze - Strawberry Fields

Hello everyone!

Today I have a swatch of China Glaze's Strawberry Fields. I don't know why it took me this long to pick up this polish because it's based on my favorite fruit: strawberries. I love strawberries so much, it's a problem. I can eat a whole carton of them and still not get sick of them lol. I was really excited to pick this polish up during the Sally's BOGO sale on China Glaze polishes (and I got the last one too!). Let's see the polish!


Strawberry Fields is a medium pink jelly with gold glass flecks. This is three coats with a top coat. My camera made it a little lighter than it really is for some reason. It's a tad bit darker than what my photos show.


The application and formula was great with this polish. The first coat is pretty sheer, but the color builds up after the second and third. I had no problems with this polish. Since it's a jelly, it takes a little bit longer to dry, but it's not a big deal.

I wish my camera captured the gold glass flecks better, but I did a closeup so that you can see it better. 


It kind of reminds me of strawberries, but at the same time it doesn't. I think if it was a bit more red it probably would. If anything, it reminds me a watermelon color (which I like as well!). It's a pretty polish nonetheless.

Overall, this is probably my favorite pink in my collection right now. It has a great formula and the glass flecks really make it pop out. I'm planning on doing some nail art with this as my base, so look out for that tomorrow!

What do you think of this polish? Does Strawberry Fields remind you of strawberries? Let me know in the comments!

Thanks for reading!

Friday, March 7, 2014

Spring Rose Nails

Happy Friday everyone!

I have another nail art design to show you today! I did a classic rose design that's perfect for spring. I think I've been wanting some spring weather, but I know I'm not going to get it over here until April. Until then, I'll just keep my nails all bright and springy. 

This is a popular floral design that many have done, but I really like this design. Let's get to the design!


For this design, I started out with two coats of Sally Hansen's Lacey Lilac as the base color. With a dotting tool, I created polka dots with Sinful Colors Snow Me White for the background.


I used Essie's Lights, Wet n Wild's Tickled Pink and a dotting tool to make the roses. For the leaves, I used Essie's Mojito Madness with a detail brush. 

Finally, I topped it off with China Glaze's Fairy Dust.


I don't do roses often, but this is the first time that they've actually turned out really good. I want to incorporate more roses in my future nail art designs. This is a pretty popular design, but I'm glad that it came out really good.


What do you all think of this design? Let me know in the comments!

Thanks for reading!

Thursday, March 6, 2014

Triangle Border Nails

Hello everyone!

I finally had time for some nail art! It feels like forever since I've done nail art, which is kind of a problem lol. Actually, I did some nail art earlier in the week, but it didn't work out as planned. I took the photos and then realized that there was a hair on the nail and I had already put top coat on it! I was so devastated. Don't you just hate that? 

Enough of me rambling for now lol. For this nail design, I created a border design using triangles. There's so many things that you can do with triangles in designs. I've been sketching a lot of triangle nail art for some reason. Let's get to the design!


For this design, I painted two coats of Sinful Colors Rainstorm as the base color. 


With a detail brush, I alternated between Sinful Colors Snow Me White and Sinful Colors Sweet Nothing and created triangles around the nail. Finally, I sealed my design with a top coat.


I love how this design came out. It's a bold design, but it's also simple. I really like how it made a nice burst shape in the middle. I was contemplating on putting something in the middle, but I decided against it. I think if I added anything else, it would be way too busy. I like the balance in this design.


What do you think of this design? What's your favorite nail art to do?

Thanks for reading!

Wednesday, March 5, 2014

BPS Nail Foils

Hey everyone!

How's everyone doing? I'm still hacking up my lungs over here, so I've been taking it easy. Luckily, I'm not that sick that I don't feel like doing nails lol.

For today, I have another Born Pretty Store review! This time, I'm reviewing some nail foil. I've actually never used nail foils before, so this was my first attempt at using them. For my first time, it wasn't all that bad. Let's get to the review!


The nail foil (ID 12413) is a a mix between a purple and pink holo and comes in a foldable sheet.When you unfold it, there's two big squares in the middle and two smaller rectangles on the sides equaling to four pieces of foil. What I like about this is that there's enough foil to last you a while, so there's enough for more than 10 manicures at least. The foil is $.99 at the Born Pretty Store, which I think is a really good deal for the amount that you get.


Since I don't have nail glue on hand, I followed The Nail Polish Challenge's tutorial on applying foil without glue that was posted on the page of the foils. It was pretty simple to use the foil.


Before you start, I would recommend cutting a few pieces of the foil just so you have it on hand. You don't need much. I cut out a square of foil and it was enough for all my nails.

For these nails, I started out with one coat of Sinful Colors Black on Black. The trick to applying the foils this way is to not let the polish dry completely. You want to get it to where you can still touch it, but it's still a little wet.  

While it's still tacky, place the gray side of the foil onto the nail and lightly rub it on the nail. Finally, you pull up the foil and repeat until you get the desired results. Also, it's best not to use top coat since you'll lose the shine of the foil. I did add top coat to my thumb, and it completely lost its shine and the holo effect was gone.

Sometimes you have to rub harder for the foil to pull up if it's almost dry. If your polish happens to dry completely, add a little more polish to the spots that you want foil on.


For my first time using nail foils, I thought I did an okay job. It did take me a while to get the hang of it because I would have polish come off the nail or I didn't get the foil on before the polish dried. It does take a few tries, but it does add a lot to your manicure. It's a quick fix if you want some easy nail art on your nails.

I couldn't really capture the holo on my camera, but you can see the holo up close though.

The only downfall is that the foil comes off very easily. I noticed when I washed my hands and did some other things throughout the day, some of the foil would come off. When I woke up this morning, my foil was completely gone and I had to start over again. I think the foil isn't really made to last long since top coat is out of the picture, so I'm not really surprised that it came off that quickly. 


Overall, I liked the nail foil. I wish that I could get a few days wear out of them, but I think nail foils are best for one day use only, unless you're not that rough with your hands like I am. I really liked the holo in this foil as well. While it wasn't strong, you could still see it and it gave off a nice effect. 

I would recommend picking these up because they have a nice variety of colors and patterns in the store for a good price. As I said before, these are best for one day use if you need to add something to your manicure or for quick nail art.

You can get these nail foils for $.99 and other nail art supplies at the Born Pretty Store. You can also use my coupon code SHBQ10 for an extra 10% off your entire purchase!


What do you think of these nail foils?

Thanks for reading!

*This product was provided to me for my honest review*

Monday, March 3, 2014

China Glaze Sea Goddess - Spring 2014 [PIC HEAVY!]

Hello everyone!

I have three shades from the China Glaze Sea Goddess Spring 2014 collection to share with you today! I think this is one of the rare moments where I'm featuring polishes from a current collection lol. I've actually been eyeing this collection from afar, so I was happy when my girlfriend treated me to these polishes and more (she's so sweet!). 

I don't really have many texture polishes in my collection, but I do like them. They're something fun and different than regular polishes. I know a lot of people are kind of getting tired of the trend, but I actually like it and I'm really loving these shades more than I thought I would. Let's get to the review!


Seahorsin' Around is a turquoise textured polish with gold and cyan glitters. This is two coats without a top coat. I was really surprised how vibrant the color is. In the bottle, it looks blue. On the nail it's a vibrant turquoise, which is great because it makes it more unique. It really reminds me of the sea. I had no difficulties with Seahorsin' Around as far as application and formula.


The last two photos are with two coats of top coat. There was a bit of shine, but you can still feel the texture. As with most textured polishes, top coat gets eaten up quick and this was the case with these polishes. They still look good with top coat though. The glitters really pop out!
With top coat
With top coat

Tail Me Something is a lilac textured polish with silver and purple glitter. This is two coats with a top coat. I had no difficulties with this polish as far as application and formula. 

I really liked Tail Me Something, but I wish the silver and purple glitter was a little more prominent in the polish. It's very subtle to the point where you can't tell that there's glitter in it. I still love this color, but it's not the most unique color out there.


I actually prefer Tail Me Something with top coat, but the texture was still there with two coats of top coat as said before. Still, this is a gorgeous color with or without top coat.

With top coat
With top coat

Wish on a Starfish is a bubblegum pink textured polish with gold shimmer. This is three coats without a top coat. This was a bit sheer, but it leveled itself out after the second and third coat.

Out of the three, this is my favorite. I love how strong the gold is in this polish. It's such a unique and gorgeous polish.


Also, Wish on a Starfish looked the best with top coat. While you could still feel the texture, it was the glossiest out of the three. I prefer this polish with top coat because the gold shimmer pops out even more.

With top coat
With top coat
Overall, I'm very satisfied with my picks from this collection. I think the colors are pretty unique and the formulas were great. Out of the three, Wish on a Starfish is my favorite. I want to try the other three now, even though they really didn't pop out to me like these three did. For now, I'm pretty happy with these polishes.

What do you think of these polishes? Do you like textured polishes?

Thanks for reading! 

Sunday, March 2, 2014

Revlon - Amethyst

Hello everyone!

I'm so sorry about this week everyone. I had to do some things for the job that I was talking about in my last post and on top of all that, Tiana (my girlfriend) got me sick. I'm feeling a bit better, so I'll be back into the swing of things. Tiana also bought me quite a few polishes during the week that I'll be showing you in the future and hopefully sneak in some nail art!

For today, I'll be showing you Revlon's Amethyst. Tiana actually picked this out for me, since she loves the color purple.


Amethyst is a medium purple with pink and blue microshimmer. This is two coats with a top coat. I bought this during my Big Lots haul and it was $1.50. 


The application and formula for Amethyst was good. I really had no problems with applying it. The Revlon Colorstay polishes have a nice rounded brush, which I love and it makes it easier to apply.


I really like the satin/shiny look with this polish. It's so shiny in person. As far as the color, it doesn't really wow me. I do love the pink and blue microshimmer, but it's very subtle on the nail that you almost can't see it.


Overall, I'm on the fence about this polish. While I love the shine on Amethyst, the color is a little meh to me. I wish more of the microshimmer showed a little more in the polish.

What do you think of this polish?

Thanks for reading!

LinkWithin

Related Posts Plugin for WordPress, Blogger...